Your Cart is Empty


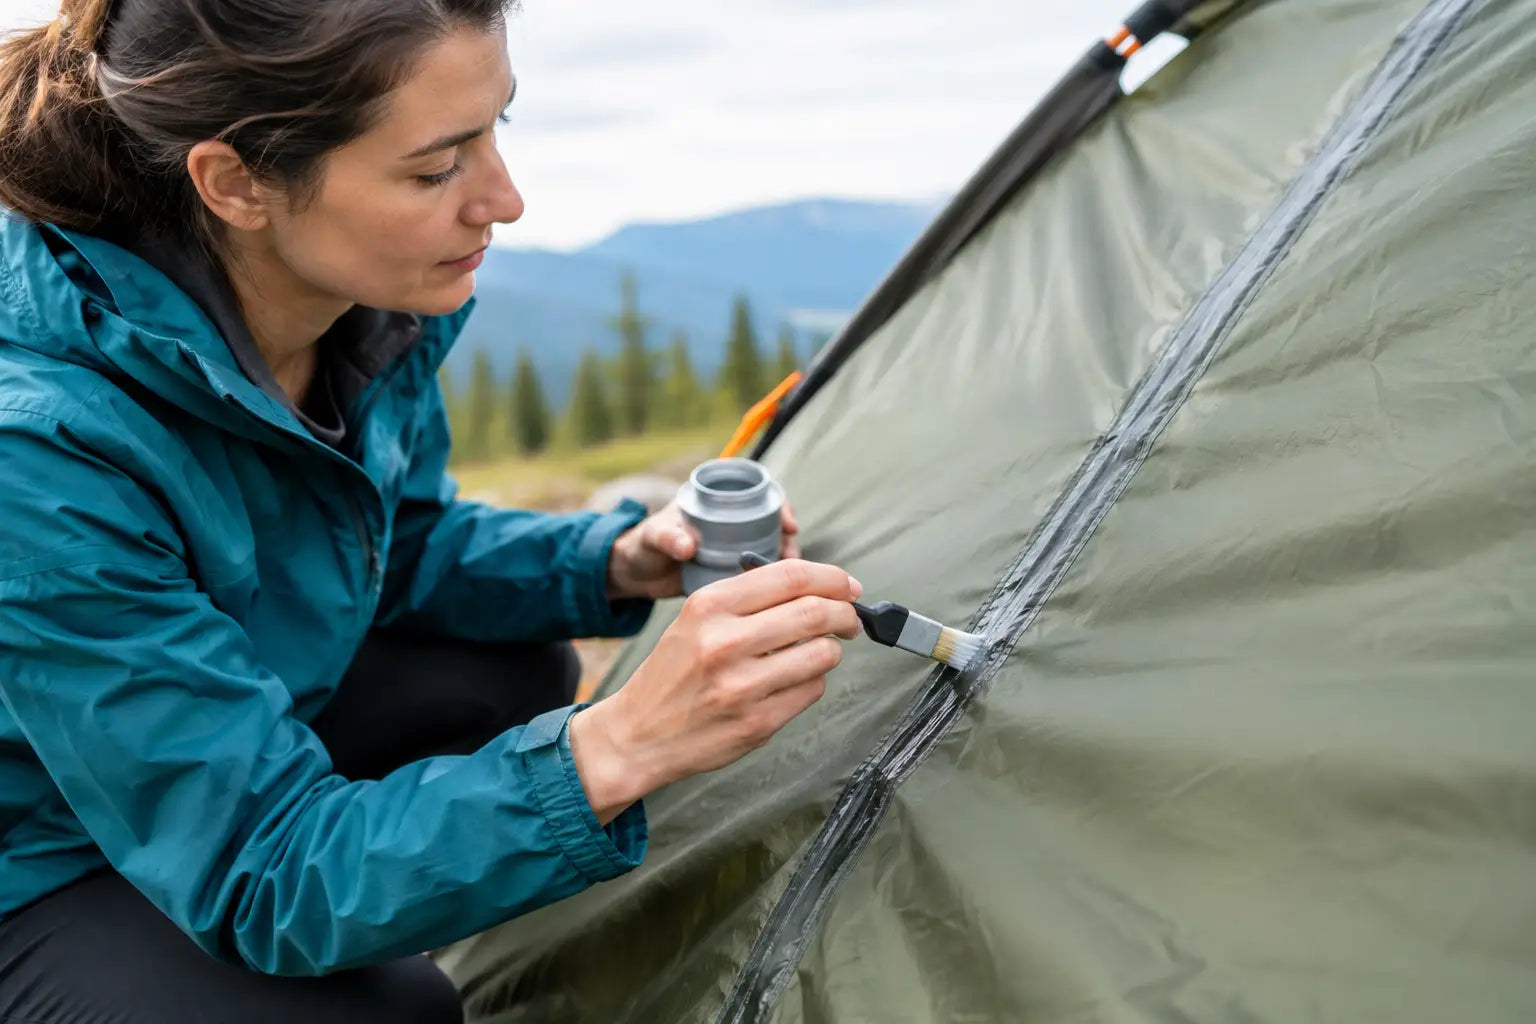

A tent can look perfectly healthy in the backyard, then start dripping directly onto your sleeping bag during the first hard rain of a weekend trip. In most cases, the fabric is not the problem. The weak point is the stitching. Learning how to waterproof tent seams is one of the simplest ways to keep a reliable shelter in service, avoid a miserable night, and get more seasons from the gear you already own.
Tent seams are full of tiny needle holes. Many tents leave the factory with seam tape or a coating on the inside, but sun exposure, repeated packing, abrasion, and time can make that protection crack, peel, or lose its grip. A little maintenance before wet-weather camping is far easier than trying to manage puddles at 2 a.m.
Start by setting up your tent in a dry, clean area. Look closely at the rainfly first. The fly is the outer layer that takes the brunt of rain, and its seams are the most likely source of leaks. Pay special attention to ridge lines, panel seams, corners, vents, zipper flaps, and any attachment points where webbing or guy-out loops meet the fabric.
Next, inspect the tent body and floor. A bathtub-style floor usually has seams several inches above the ground, plus seams at the corners. If water is getting in from below or pooling at the edges, those seams need attention too. A footprint helps protect the floor from wear, but it does not replace sound seam sealing.
Turn the fly and tent inside out when possible. Factory seam tape is usually visible on the interior side as a narrow, slightly shiny strip over the stitching. If it is smooth and firmly attached, it may still be doing its job. If it is lifting, brittle, sticky, or missing in spots, plan on repairs before your next trip.
The most important decision is matching the sealer to your tent fabric. Using the wrong product can leave you with poor adhesion, a gummy finish, or a repair that fails when the weather turns.
Most tents use one of two coating systems. Polyurethane-coated nylon or polyester typically needs a polyurethane-compatible seam sealer. Silicone-coated fabrics, often called silnylon or silpoly, need a silicone-based sealer. Check the tent's care label, manual, or manufacturer information if you still have it. When in doubt, test a small hidden area first.
You will usually need these supplies:
A careful application takes a little time, but the actual work is straightforward. Pick a dry day with enough time for the sealant to cure fully. High humidity, cold temperatures, and rushing the process are common reasons repairs fail.
Set up the tent and rainfly, or lay the pieces flat if that gives you better access to the seams. Brush away dust, pine needles, and loose debris. Wipe the seam area gently with a cloth lightly dampened with rubbing alcohol or the cleaner recommended by the sealant maker.
Do not soak the fabric. The goal is to remove body oils, dirt, and residue that can keep the sealer from bonding. Let every cleaned area dry completely before applying anything.
If factory seam tape is loose or peeling, it can prevent a new repair from sticking correctly. Carefully lift and remove only the damaged sections. Work slowly so you do not tear the fabric or pull at the stitching.
If the tape is still firmly bonded but the seam is leaking, you may be able to apply compatible sealer over the exterior stitching instead. This is often the easier route on older tents. For extensive tape failure throughout a heavily used tent, weigh the repair time against the age and overall condition of the shelter.
Apply sealer directly over the line of stitching, covering the holes and extending slightly to either side. A narrow, continuous coat is what you want. Use the brush or applicator to work the product into the thread and smooth out thick spots.
On a rainfly, seal the seams on the side recommended by the product instructions. Many repairs are applied to the outside because that is where rain lands, while taped seams are often treated from the inside after old tape has been removed. There is no universal rule, so let fabric type and sealer directions lead the way.
At corners, guy-out patches, and intersections where several seams meet, take extra care. These points see more tension and are more likely to leak during wind-driven rain. Cover the stitching without building up a large blob of sealant.
Leave the tent set up until the sealer is fully cured. Depending on the product and conditions, this can take several hours or up to a full day. Keep it out of rain, blowing dust, and direct contact with leaves or grass while it dries.
Do not pack a freshly sealed tent into its stuff sack because the coating can transfer, wrinkle, or stick to itself. Good curing time is part of the job, not an optional final step.
Once cured, test your work before leaving home. Spray the fly and exterior seams with a garden hose set to a gentle rain-like spray. Avoid blasting the fabric at close range, since that creates pressure beyond normal rainfall.
Check the inside of the tent for damp lines or drips. If a seam still leaks, dry the area and add a thin second coat only where needed. A quick test in the driveway can save an entire camping trip.
The rainfly gets most of the attention, but floor seams matter just as much. Seal the seams around the bathtub floor, especially at corners and where the floor joins the walls. If the floor coating itself is worn, seam sealer alone will not solve the problem. You may need a compatible fabric coating treatment or, if the tent is near the end of its life, a replacement shelter.
A rainfly can also leak through worn waterproof coating, not just seams. If water soaks into the fly fabric instead of beading and running off, clean it first and consider renewing the durable water repellent finish. Remember that DWR helps water shed from the fabric, while seam sealer closes the stitched holes. They do different jobs.
Do not use household caulk, duct tape, glue, or waterproof sprays as a substitute for proper tent seam sealer. They may appear to work for a short time, but they usually crack, peel, add unnecessary weight, or damage technical fabric.
Also avoid sealing a dirty, damp tent. Even premium sealer cannot bond well over grime or moisture. And resist the urge to seal every inch of every panel. Focus on stitched seams, high-stress attachment points, and known leak areas. That keeps the repair lighter, cleaner, and easier to inspect later.
Campsite setup matters too. A perfectly sealed tent can still feel wet if it is pitched in a low spot where runoff collects. Choose higher ground, clear small sticks and stones from under the floor, and angle doors away from prevailing wind when possible. Never dig trenches around a tent at established campgrounds or in natural areas - it damages the site and is often against campground rules.
There is no fixed calendar for seam sealing. A weekend camper may get several years from a factory seal, while someone who spends long seasons on the road or regularly camps in heat and heavy rain may need to inspect annually. Check seams before any extended trip, especially if the tent has been stored in a hot garage, damp basement, or tightly packed tote.
A quick preseason inspection should include the rainfly, floor corners, zipper areas, and guy-out points. If you spot peeling tape, tacky coating, or old leak stains, handle it before you load the cooler and hit the road. A small tube of seam sealer belongs in a practical camp repair kit alongside patch material, spare cord, and basic tools.
A dry shelter changes the whole trip. Take an afternoon to prep your tent, test it at home, and head out knowing your camp is ready when the forecast shifts. Gear up, pitch smart, and enjoy the rain from the dry side of the fabric.