Your Cart is Empty


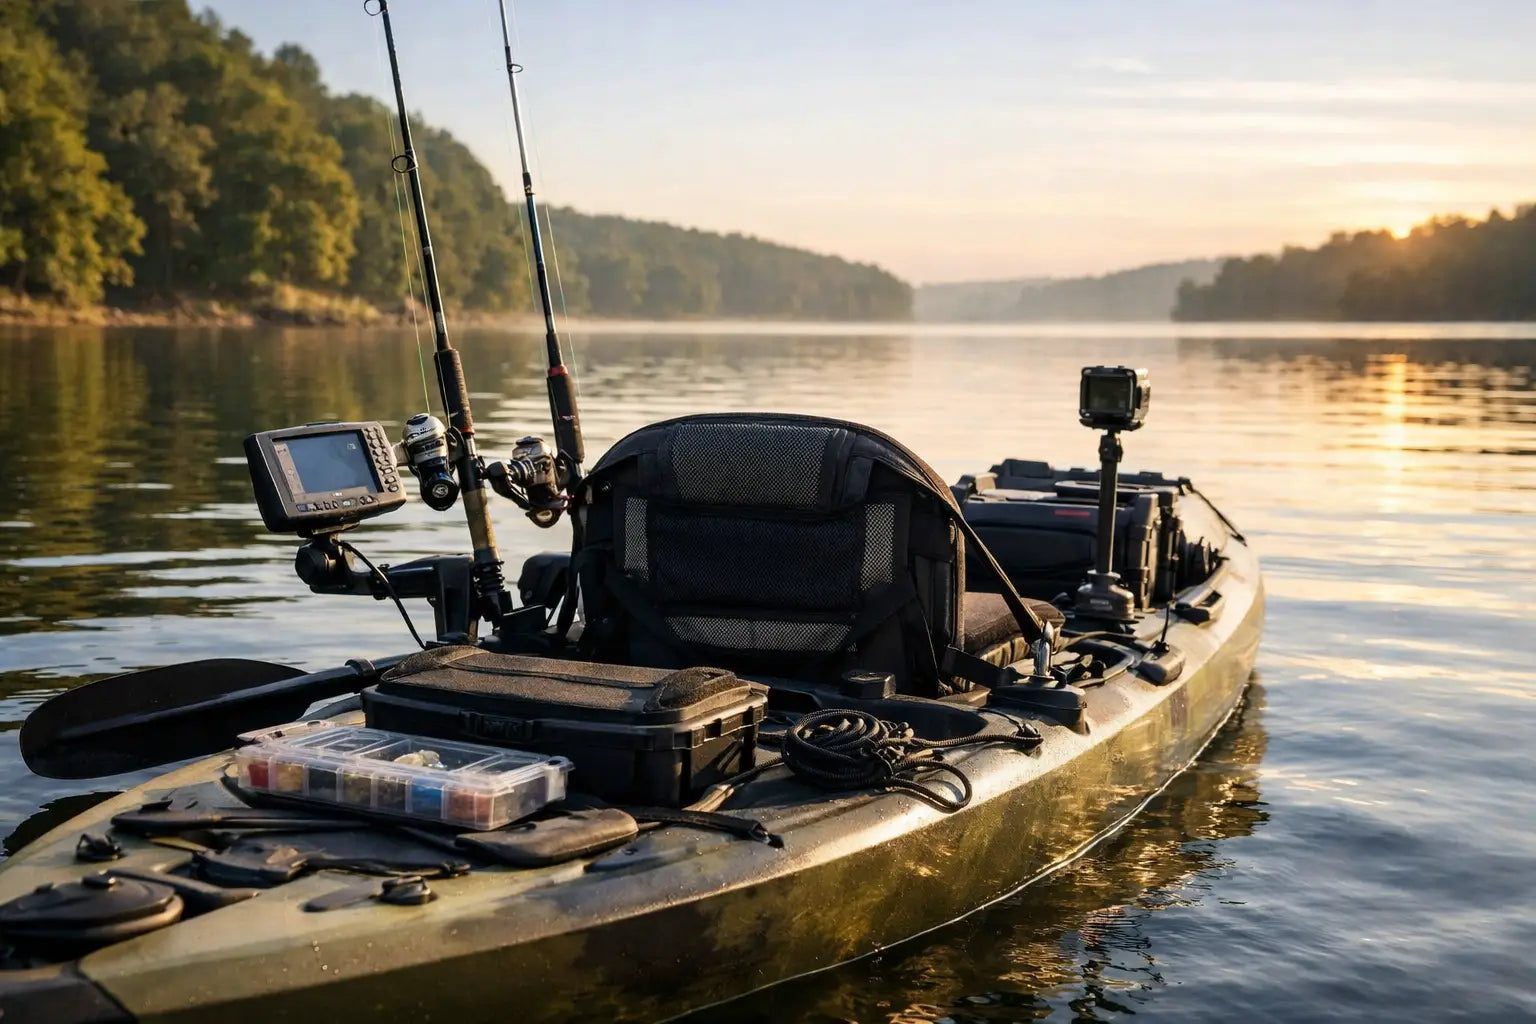

A search for “how to rig fishing kayak” setups usually starts with rod holders and a fish finder. Those are useful, but the best rig is not the one with the most accessories. It is the one that keeps your deck clear, your gear within reach, and your kayak balanced when the bite turns on.
Rigging a fishing kayak is about preparing for the water you actually fish. A calm farm pond, tidal marsh, big reservoir, and flowing river each demand a different approach. Start with the essentials, make a few trips, then add gear only when it solves a real problem. Gear up with purpose, and you will spend more time casting and less time untangling equipment.
Before mounting anything, sit in your kayak on dry land and picture a normal fishing day. Where do your paddle, tackle box, landing net, water bottle, and rods naturally need to go? Can you reach them without twisting hard or standing up? A good layout supports easy movement and does not block your footing.
Keep heavier items low and close to the center of the kayak. A battery, crate full of tackle, and cooler can change how a lightweight kayak handles, especially in wind or chop. If your kayak feels tippy after adding gear, do not assume you need more accessories. First, reduce weight, move it closer to the seat, or leave nonessential items at home.
The deck should remain as open as possible. Loose tackle bags, exposed hooks, and rods laid across your lap create hazards when you need to paddle, land a fish, or make a quick correction near shore. Use bungee rigging, gear tracks, and secure storage to give every item a home.
Many fishing kayaks include molded-in gear tracks, mounting inserts, and storage wells. Use those features first. Track-mounted accessories let you adjust rod holders, camera mounts, and electronics without putting holes in the hull.
If you need to drill, check the manufacturer's guidance and look underneath the mounting area for clearance. Use marine-grade hardware and seal every hole properly. A poorly placed screw can interfere with hull structure, create a leak, or make future upgrades harder. For many anglers, track mounts and removable accessory bases offer enough flexibility without permanent modifications.
A practical kayak rig starts with a handful of high-value pieces: paddle management, rod storage, tackle storage, and a landing net. Once these are dialed in, your trips feel more organized immediately.
A paddle leash is simple insurance. You may set the paddle down to cast, grab a fish, or adjust your position. In current or wind, an unsecured paddle can disappear before you can react. Mount or clip the leash where it will not cross your casting arm or snag your pedals if you use a pedal-drive kayak.
Rod holders are next, but placement matters more than quantity. A forward-facing holder can keep a rod ready for trolling or bait fishing while you paddle. Rear holders work well for transporting extra rods and keeping them out of your casting lane. Avoid placing a holder where a rod butt blocks your paddle stroke or where a hooked fish could pull the rod across your body.
For tackle, a milk crate or purpose-built rear storage system is a reliable starting point. It keeps utility boxes, soft plastics, rain gear, and a small dry bag together behind the seat. Secure the crate to the kayak so it cannot float away after a capsize. If you fish skinny water and need quick access, a small tackle tray near the seat is useful, but resist turning the cockpit into a storage bin.
Your landing net should be reachable with one hand. A compact folding net fits small kayak decks well, while a larger rubber-coated net makes more sense for bass, walleye, or larger fish. Store it with the hoop facing away from your legs to reduce hook snags.
A fish finder can help you locate depth changes, bait, cover, and fish, but it is not mandatory for every trip. If you fish shallow ponds or sight-fish cover, a good pair of polarized sunglasses may be more valuable than electronics. On reservoirs, offshore structure, and unfamiliar water, a compact fish finder can save serious searching time.
Mount the display where you can see it without lowering your head or interfering with casting. The front rail or a center console area often works well. Use a removable mount if you transport your kayak in an open truck bed or store it outside.
Battery placement is just as important. A small lithium battery provides long runtime without adding much weight, but it still needs a dry, secured location. Place it inside the hull or in a waterproof battery box near the center of the kayak. Route cables neatly and leave enough slack for seat adjustment and normal movement. Exposed wires catch hooks, collect water, and make troubleshooting difficult.
For the transducer, use a factory transducer recess when available. Otherwise, choose a mounting method designed for your hull and fishing style. A side-arm mount is easy to install and adjust, but it can be vulnerable in shallow, rocky water. An inside-hull installation is protected, though readings may vary depending on the kayak material and setup.
Holding position is one of the biggest advantages you can give yourself. Wind can push a kayak off a point before you finish a cast. Current can pull you past a productive seam in seconds. Your solution depends on where you fish.
In shallow water with a soft bottom, an anchor pole or stakeout pole is fast, quiet, and effective. It is a strong choice for flats, marshes, and protected banks. In deeper water, a compact anchor system with an anchor trolley gives you better control over the kayak's angle to wind and current.
An anchor trolley runs along the side of the kayak and allows you to shift the anchor connection toward the bow or stern. This helps you face the direction you need for casting. Never anchor from the side in moving water or strong current. A sideways pull can create a dangerous situation. Keep a quick-release connection on any anchor line so you can disconnect fast if conditions change.
If you mostly fish lakes with moderate wind, a drift sock may be a better choice than a full anchor. It slows your drift while letting you cover water naturally. This is especially useful when working long shorelines, flats, or submerged vegetation.
A fishing kayak is a boat, not just a floating platform. Your personal flotation device belongs on your body, not strapped behind the seat. Choose a comfortable, fishing-specific PFD with room for movement and pockets for small essentials.
Carry a whistle, light, and phone in a waterproof case or dry bag. A white light is especially useful for low-light launches, evening returns, and visibility around other boaters. In areas with powerboat traffic, bright clothing, a flag, and a 360-degree visibility light can make a major difference.
A compact first-aid kit, sunscreen, hydration, and a basic repair kit are worth the space. Add pliers or hook cutters where you can grab them quickly. If a hook is buried or a line wraps around gear, you do not want to dig through a crate while the kayak drifts.
The best way to learn how to rig a fishing kayak is to test it on a short, low-pressure outing. Launch close to home, paddle into light wind, make a few casts, reach for your net, and practice accessing your safety gear. You will quickly notice what is awkward, loose, or unnecessary.
Change one or two things at a time. Move a rod holder before buying another one. Try a lighter crate before adding more storage. A clean, balanced setup is easier to paddle, safer to fish from, and faster to load for an early start.
Build your rig around the fish, the water, and the way you move. When every piece of gear earns its place, your kayak becomes less like a pile of accessories and more like a dependable fishing platform ready for the next launch.