Your Cart is Empty



A single hard freeze can turn a great RV season into an expensive repair job. Water expands as it freezes, and it does not need much room to crack a fitting, split a PEX line, damage a pump, or ruin a faucet. To winterize RV plumbing correctly, you need to remove the water from the system and protect the places where a small amount can remain.
This is one job worth doing before the forecast gets serious. Whether your camper is parked in a driveway, stored at a lot, or waiting for spring at a campground, a few hours of preparation can protect the plumbing that keeps every trip comfortable.
Winterize before your RV will sit in temperatures at or below 32°F for more than a brief overnight dip. If you are still traveling through cold country and actively using the RV, you may be able to keep the system running with heat, insulated hoses, and careful monitoring. That approach works for some travelers, but it demands attention and electricity or propane.
For seasonal storage, winterizing is the more dependable move. Do not wait for the first freeze warning if you can avoid it. Water trapped in an exterior shower, low-point line, toilet valve, or city-water connection can freeze long before you get around to the job.
Gather your supplies first so you are not hunting for a fitting with drained lines and fading daylight. Most RVs need two to three gallons of RV and marine antifreeze, though larger coaches with multiple bathrooms may need more. Always use non-toxic pink RV antifreeze made for potable water systems. Automotive antifreeze is poisonous and should never go into an RV fresh-water system.
You will also want a water-heater bypass kit if your RV does not already have one, a hand wrench or screwdriver for drain plugs, and a short hose for your water pump winterizing connection if your setup requires one. If you plan to use compressed air, use an RV blowout plug and a regulated air compressor.
A few extra items make the process easier:
Start by turning off the water heater, the water pump, and any water supply connection. If the water heater has recently been used, give it time to cool. Opening a hot water heater under pressure is a quick way to create a dangerous mess.
Open the hot and cold sides of every faucet inside the RV. Include the kitchen sink, bathroom sink, shower, tub, exterior shower, and any bar sink. Flush the toilet until the water stops moving through the bowl. Open the fresh-water tank drain and the low-point drains, which are usually found underneath the RV or inside a utility bay.
Next, relieve pressure at the water heater by opening its pressure-relief valve. Remove the drain plug or anode rod, depending on your water-heater model, and let the tank empty. Inspect the anode rod while it is out. If it is heavily corroded, replace it before next season.
Do not skip the water heater bypass step. Filling a six- or ten-gallon water heater with antifreeze wastes product and creates more cleanup in spring. Once the tank is empty, set the bypass valves so antifreeze will flow around the heater instead of into it.
There are two common ways to protect RV plumbing: pumping RV antifreeze through the lines or blowing the lines out with compressed air. Both can work when done properly, but they offer different advantages.
Antifreeze is the better choice for most owners because it protects low spots, valves, and traps where water can linger. It also gives you a visible confirmation that protected fluid has reached each fixture. The trade-off is using several gallons of antifreeze and flushing the system thoroughly in spring.
Compressed air leaves less antifreeze to flush later, but it requires a regulated compressor and careful pressure control. Keep pressure at 30 to 40 PSI for most RV plumbing systems, unless your manufacturer specifies otherwise. Too much pressure can damage fittings, faucet cartridges, and delicate components.
For maximum protection in a long, cold winter, many RV owners blow out the lines first and then pump antifreeze through them. That is not mandatory, but it reduces the amount of water left behind and uses less antifreeze than pumping it into a fully wet system.
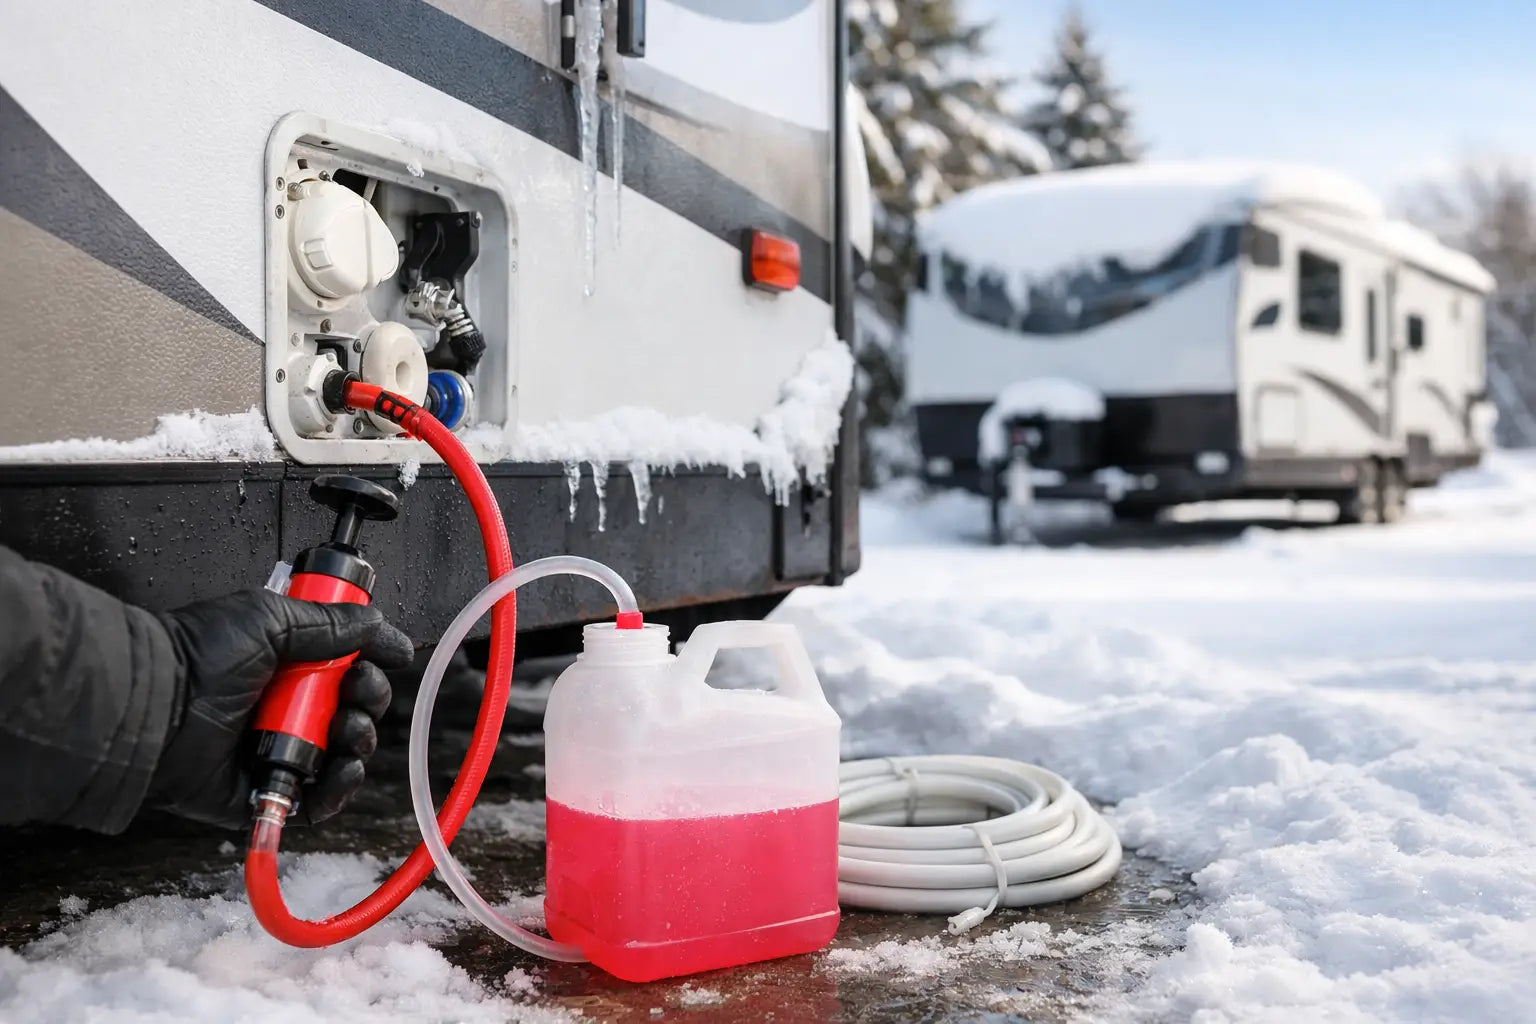
With the water heater bypassed and all drains closed, connect your water pump to the antifreeze supply using the winterizing siphon hose. Some RVs have a dedicated valve and short tube beside the pump. Others may require you to disconnect the pump inlet and attach a temporary hose.
Place the hose in the antifreeze bottle and turn on the pump. Start with the faucet farthest from the pump. Open the cold side until pink antifreeze flows steadily, then close it and repeat on the hot side. Work your way through every fixture, including the shower and exterior shower. A forgotten outside shower is one of the most common causes of spring plumbing repairs.
Flush the toilet until pink antifreeze appears in the bowl. Then pour about a cup of antifreeze into each sink and shower drain. This protects the P-traps, where water naturally remains even after the supply lines are drained. Pour some into the toilet bowl as well to protect the seal and keep it from drying out.
Do not forget appliance lines if your RV has them. An ice maker, washer, dishwasher, or water filter can have separate water routes that need manufacturer-specific winterizing steps. Remove or bypass water filters before pumping antifreeze through the system. Antifreeze can ruin a filter cartridge and leave an unpleasant taste behind.
Once the major plumbing lines are protected, spend a few minutes on the components that do not always get attention. Disconnect and drain your drinking-water hose. Drain the water pressure regulator, filter canister, and any quick-connect fittings. Store these items indoors if possible.
Check the city-water inlet. Press the small center valve briefly with a screwdriver only after the water pressure is off. If water comes out, add antifreeze through the system or use a blowout adapter until that line is clear. Be gentle - the valve can be damaged if pushed too hard.
If your RV has a black tank flush connection, consult the owner’s manual before winterizing it. Some systems need antifreeze routed through the flush line; others should only be drained. The same goes for tankless water heaters, which have specific drain and isolation procedures.
Finally, walk through the RV one more time. Every faucet should be closed, low-point drain caps should be secure, the water heater should be drained and bypassed, and each drain should hold pink antifreeze. Leave a note near the control panel or driver’s seat reminding yourself that the plumbing has been winterized. It can prevent someone from turning on the pump or filling the water heater before spring prep is complete.
The biggest mistake is assuming the fresh-water tank is empty enough. Even if you do not plan to use the tank, drain it completely. A partially full tank can freeze, and leftover water can become stale during storage.
Another common issue is running the water pump dry for too long. A few seconds while transitioning to the antifreeze hose is usually fine, but extended dry running can damage the pump. Keep the antifreeze bottle close and watch the intake hose as you work.
Avoid using household plumbing antifreeze or automotive coolant. The right pink RV antifreeze is formulated for potable-water systems and is the safe choice for lines, drains, and fixtures. It is affordable protection compared with replacing cracked plumbing in the spring.
A well-winterized RV is ready to sit through the cold without costing you sleep. Get the plumbing protected, cover the other seasonal maintenance basics, and your rig will be one step closer to a smooth first trip when the roads thaw and the next adventure calls.