Your Cart is Empty



A few inches of water in the bilge can turn a good day on the water into a rushed trip back to the ramp. Installing a boat bilge pump is one of the most practical upgrades you can make for safety, peace of mind, and protecting the gear below deck. Done right, it gives unwanted water a direct route out of the hull before it becomes a bigger problem.
A bilge pump is not a substitute for fixing leaks, checking fittings, or carrying the required safety equipment. It is your backup plan for rainwater, spray, minor seepage, and unexpected water entering the boat. Gear up before launch, not after you hear the pump struggling.
The best pump size depends on your boat, how you use it, and how much water may collect in the bilge. Small fishing boats, jon boats, and runabouts often use pumps in the 500 to 1,100 gallons-per-hour range. Larger boats, boats used offshore, or boats with bigger bilge areas may need more capacity and often benefit from more than one pump.
Do not choose by the GPH number alone. Pump ratings are generally measured under ideal conditions. Once water has to travel upward through hose, around bends, and out through a fitting, actual flow drops. A slightly larger pump can be a smart move when the discharge run is long or the outlet sits well above the pump.
An automatic bilge pump or a standard pump paired with a float switch is usually the better choice for most recreational boaters. Automatic operation matters when rain hits while the boat is tied up or stored outdoors. A manual-only pump can work, but it requires someone to be onboard, awake, and paying attention.
Match the pump to your boat's electrical system. Most smaller recreational boats use 12-volt DC pumps, while larger vessels may use 24-volt systems. Check the pump's current draw, recommended fuse size, and outlet diameter before buying wire, hose, or fittings.
Gather all parts before drilling or wiring. A clean install is easier when the pump, hose, electrical protection, and discharge fitting are designed to work together. You will typically need:
Water naturally finds the lowest point in the hull, so that is where the pump belongs. Before mounting anything, clean out leaves, old zip ties, fishing line, sand, and other debris. A clogged pump is no help when you need it.
Set the pump where it can sit low while still allowing you to reach the strainer, wiring, and discharge connection. Many pumps use a removable cartridge, which makes cleaning and replacement much easier. Do not mount a pump where a battery, cooler, fuel tank, or loose gear will block access.
If your bilge has separate compartments or a deep forward section, one pump may not cover every low spot. Water does not always travel where you expect when the boat is on plane, tied at a dock, or resting on a trailer. In that case, consider additional pumps or a layout that channels water toward the main bilge area.
Start by dry-fitting the pump and float switch. Make sure the float can rise freely and is not blocked by ribs, hoses, or wiring. If you use a separate float switch, position it near the pump but high enough that it activates before water rises beyond the level you are comfortable with.
Whenever possible, use the pump manufacturer's mounting base or an adhesive mounting pad designed for bilge use. Drilling into the bottom of the hull is rarely the first choice. If screws are necessary, verify exactly what is beneath the mounting surface and use only the recommended hardware length.
Keep the intake clear. The pump needs a level base and enough open area around the strainer to pull water in. A pump jammed into a narrow corner can leave water behind or collect debris faster.
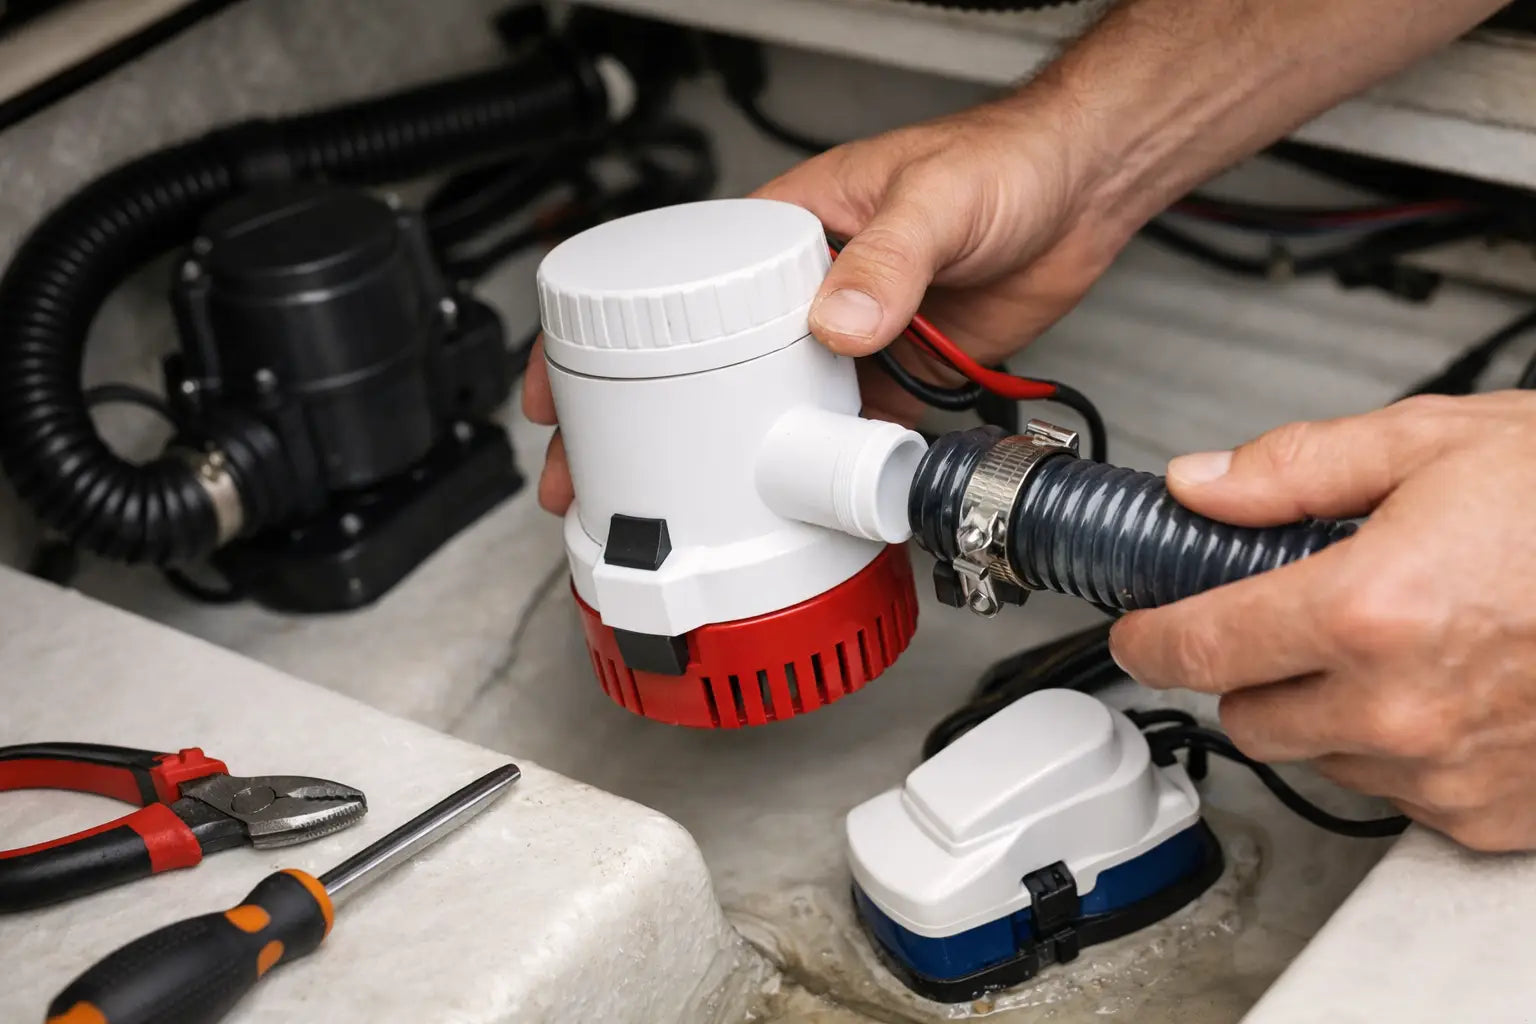
Connect the hose to the pump outlet and secure it with a stainless steel clamp. Route it upward to a discharge fitting above the waterline, ideally on the side of the hull where you can see water flowing when the pump runs. That visual check is valuable at the dock and on the trailer.
Use smooth, gradual bends rather than sharp kinks. Every bend and restriction reduces flow. Keep the hose run as short and straight as your boat allows, while also protecting it from abrasion, heat, and moving steering or engine components.
The discharge fitting should be installed above the waterline at all normal operating angles. Avoid routing the hose into an existing drain that could allow water to backflow into the boat. Some setups use a vented loop or check valve, but these are not automatic upgrades for every boat. Check valves can reduce flow and can clog, so use them only when the pump manufacturer and your boat's layout call for one.
The wiring is where many bilge pump installations fall short. Your pump needs protected power, reliable connections, and a route that stays dry and secure. Follow the pump manual for wire gauge, fuse rating, and wiring diagram. Those specifications account for the pump's draw and the length of the wire run.
For automatic operation, the pump's automatic lead is usually connected directly to the battery through an appropriately sized inline fuse. This allows the pump to run even when the battery switch is off. The manual lead runs through a helm switch or panel circuit, giving you the option to activate the pump on demand.
Keep all connections above the highest expected bilge-water level. Use crimp connectors with adhesive-lined heat shrink, then support the wire every few inches so it cannot rub against sharp edges or sag into water. Protect wires where they pass through bulkheads or near metal edges with grommets or loom.
Do not skip the fuse because the pump is small. A fuse protects the wiring from a short circuit that could become a fire risk. Place it close to the power source, as directed by the pump instructions. If your battery is old or undersized, address that too. A bilge pump cannot do its job on a weak battery.
A pump that spins is not necessarily a pump that drains. With the boat on the trailer or safely at the dock, pour clean water into the bilge until the float switch activates. Watch for water leaving the discharge fitting and listen for smooth operation. Then test the manual switch at the helm.
Check the hose connections for drips and make sure the pump stops after the water level drops. If it continues cycling, the float switch may be stuck, the sensor may be dirty, or water may be draining back through the hose. If it does not activate, check the fuse, battery voltage, wiring connections, and float movement before heading out.
Make this test part of routine boat prep, especially after winter storage, heavy rain, or a rough run. Clear debris from the strainer and inspect the hose for cracks, soft spots, or loose clamps. A quick five-minute check can save hours of cleanup and prevent expensive damage.
A single automatic pump is a solid starting point for many small boats, but it has limits. Boats kept in the water, used offshore, or built with larger enclosed bilge spaces may need a second pump mounted higher in the bilge. The lower pump handles normal water accumulation; the higher-capacity backup pump activates if water rises beyond that level.
That setup adds cost and wiring work, but it provides meaningful redundancy. It also helps if one pump becomes clogged or cannot keep up. For serious boating, reliability is rarely about one piece of gear. It comes from having layers of preparation that work together.
Before your next launch, take a minute to look into the bilge. A clean, tested pump, a charged battery, and a clear discharge hose are small details that help keep the day focused where it belongs: on the water, with more confidence and fewer surprises.