Your Cart is Empty



A tent zipper that splits open at midnight can turn a comfortable campsite into a bug-filled, drafty mess fast. The good news is that repairing tent zippers usually takes a few minutes, a careful look at the problem, and the right small part - not a new tent. Before your next campout, learn what is causing the failure so you can fix it at home instead of fighting fabric and rain at the trailhead.
Most tent zipper issues fall into one of three categories: dirt and wear, a worn slider, or damaged zipper teeth. Those problems can look similar from the outside, but the repair is different for each one.
Open the door or window panel completely and inspect both sides of the zipper track in good light. Brush away sand, pine needles, dried mud, pet hair, and loose threads. Grit is especially hard on tent zippers because it gets pressed between the slider and the teeth every time you open the door. A zipper that feels rough or sticks in one spot may only need cleaning.
Next, zip it slowly while watching behind the slider. If the zipper closes but immediately separates, the slider is usually worn or spread too wide. It is no longer squeezing the two sides together firmly enough. If teeth are missing, bent, torn away from the tape, or badly crushed, cleaning and tightening will not solve it. That section needs a more involved repair, and sometimes a professional gear-repair shop is the sensible choice.
Also check for fabric caught in the zipper. Tent doors often use thin nylon or mesh close to the track, and it can get pulled into the slider. Do not yank it free. Back the slider up gently, hold the fabric flat, and work it loose a little at a time.
A dirty zipper is the quickest fix, and regular care can prevent most frustrating failures. Use a soft toothbrush or a small nylon cleaning brush to work debris out of the teeth and zipper tape. For sticky mud or tree sap, dampen a cloth with clean water and wipe the track, then allow it to dry fully before packing the tent away.
Once the track is clean, apply a zipper-specific lubricant made for outdoor gear. A small amount goes a long way. Work the slider back and forth several times, then wipe away excess so it does not attract more dirt. Avoid oily household sprays. They can collect dust, stain fabric, and leave a residue that is hard to remove from mesh.
If you are camping and do not have zipper lubricant, a clean, dry zipper is better than experimenting with products that may damage the coating or fabric. Save the proper treatment for when you get home. Field fixes should keep the shelter usable, not create a bigger repair later.
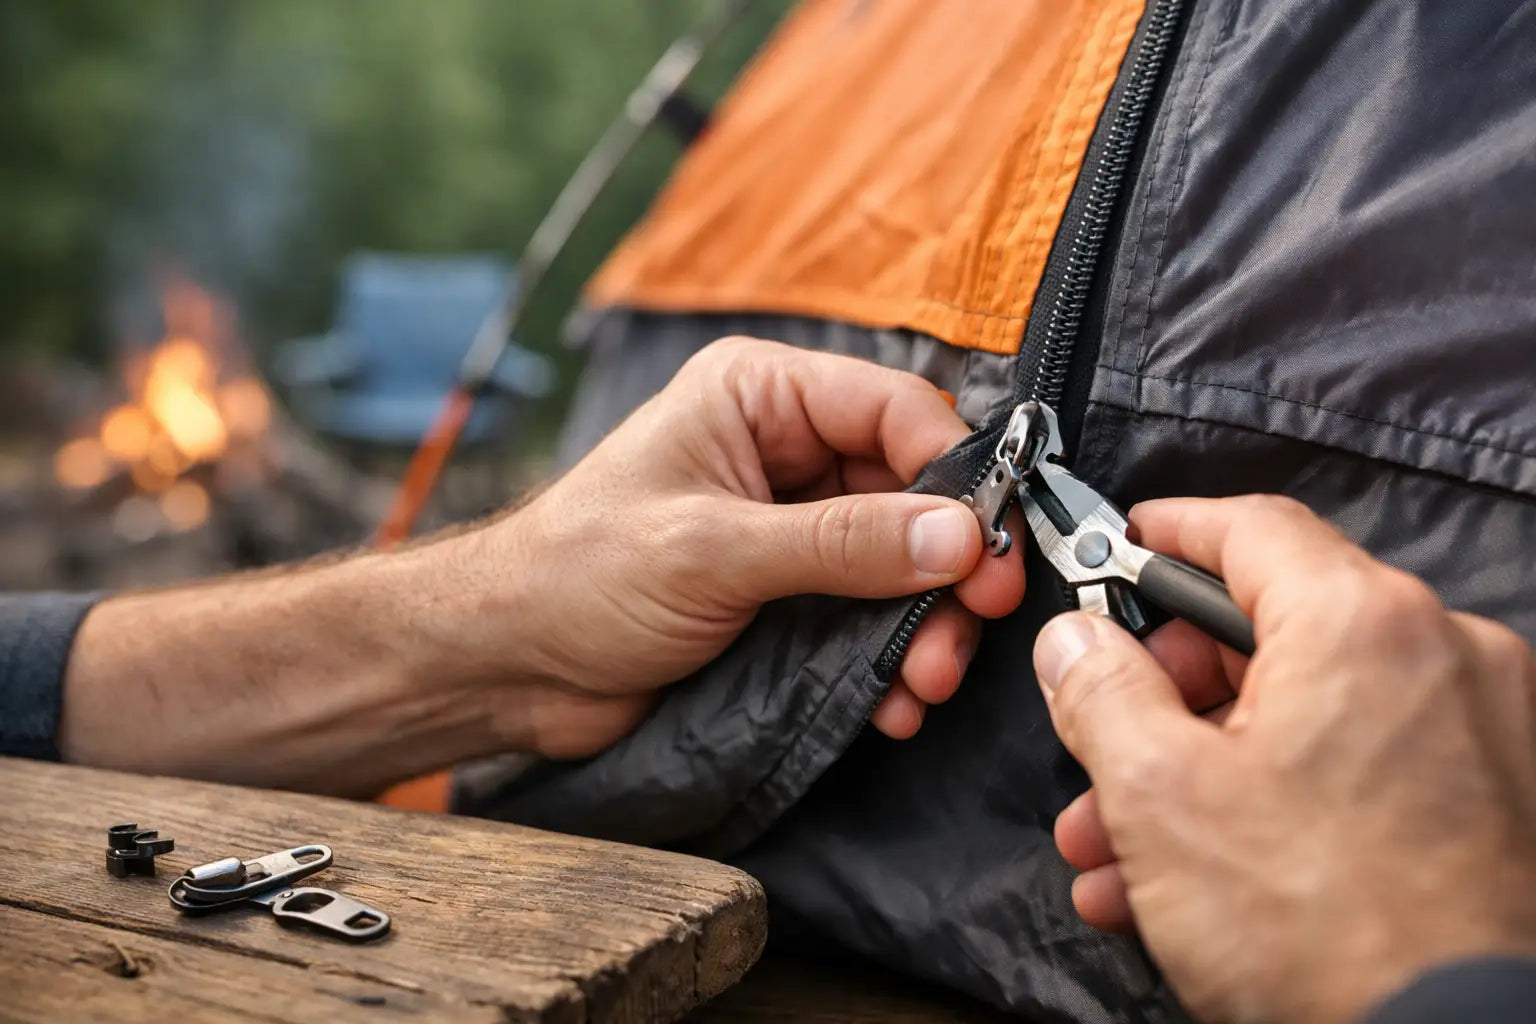
A zipper that looks intact but splits behind the slider is commonly a slider problem. On many tents, a light squeeze with small needle-nose pliers can restore enough pressure for the teeth to mesh. This is a careful adjustment, not a hard crimp.
Close the zipper as far as it will go. Position the pliers on one flat side of the slider body, away from the pull tab, and gently compress it. Test the zipper. If it still separates, make another very small adjustment on the opposite side. Work in tiny increments. Squeeze too hard and the slider can bind, crack, or become impossible to move.
This repair is most successful on metal sliders. Plastic sliders can crack under pressure, especially after years of sun exposure. If the slider is plastic, visibly worn, or already damaged, replacement is the more dependable move.
Replacing a slider is a practical repair when the zipper teeth are healthy but the old slider will not close them. First, identify the zipper type and size. Most camping tents use coil zippers, with interlocking nylon or polyester coils rather than molded plastic teeth. Look for a size marking on the back of the slider if one is present. Taking the old slider to compare with a replacement is the easiest way to avoid buying the wrong size.
You will need a compatible replacement slider, small pliers, and possibly a seam ripper, needle, and strong polyester thread. A repair kit built for outdoor zippers is worth keeping with your tent stakes, patches, and spare cordage.
Many tent zippers have a sewn stop at the top or bottom of the track. Carefully remove the stitches holding that stop so the old slider can slide off. Keep the seam ripper pointed away from the tent body and mesh. One accidental cut can create a much larger project.
With the old slider removed, align both zipper tracks evenly and feed them into the new slider. The exact method depends on whether the zipper is single-pull, double-pull, or reversed, so use the old slider as your reference before removing it. Pull the new slider slowly down the track to test engagement. If it moves smoothly and the zipper stays closed behind it, sew a new stop with several tight stitches. A few hand stitches are enough, provided they are placed through the zipper tape and not through delicate mesh.
For a double-door tent with two sliders that meet in the middle, replace the failed slider with the zipper positioned where you can still access both tracks. Take your time with alignment. A slider installed backward or with one side a tooth off will not close properly.
Missing coil sections, ripped zipper tape, and long runs of damaged teeth generally call for zipper replacement rather than a new slider. Replacing an entire tent zipper means removing stitching from the door panel, installing matching zipper tape, and sewing it accurately through technical fabric. It can be done, but it takes patience, sewing skill, and equipment that can handle the material without snagging it.
Consider the tent's value and condition before committing. On a newer family tent or a quality backpacking shelter, professional repair can be a smart investment. On an older budget tent with leaking seams, brittle coatings, or several damaged panels, replacement may make more sense. Reliable shelter is a safety and comfort issue when weather changes.
A small temporary patch may help if a short section near the end of the track is damaged, but it will not restore a full-length zipper. Avoid forcing the slider over broken teeth. That can bend more of the coil and turn a localized issue into a failed door.
The easiest zipper repair is the one you never need. Set up your tent on a clean ground cloth when possible, and shake out sand and needles before packing. Keep zipper tracks clear when opening doors, especially with kids, dogs, or bulky sleeping bags moving in and out.
Always support the door fabric with one hand while operating the zipper with the other. Tension from a poorly staked tent, a tight rain fly, or wind pulling against the panel makes the slider work harder. If a door is under strain, adjust the stakes or guy lines before pulling harder on the zipper.
Before storing the tent, make sure it is completely dry and zip the doors partway closed. This keeps the tracks aligned without storing the fabric under unnecessary tension. A quick preseason inspection - clean, lubricate, and test every door and window - gives you time to make repairs before your gear is loaded for the weekend.
A smooth, dependable zipper is a small piece of camp comfort that matters when the sun drops and the weather rolls in. Keep a compact zipper repair kit in your camping gear, treat small problems early, and your tent will be ready to help you get outside more.